Unless you run a local mail server, the only ways to test a PHP contact form include echo printing and testing on a remote server. Though both of these methods work, running a local mail server allows for greater accuracy in testing, and greater efficiency in debugging. This post will guide you through setting up a local mail server for PHP to use.
Step by Step Guide
We will use hMailServer to interact with PHP. This will allow local use of the
PHP mail() function, saving us time when creating/testing our forms. The installation and configuration should take between 10 to 20 minutes to complete.
Requirements
Before we get started, we need to make sure your machine is properly configured to allow for hMailServer installation. You will need the following items installed:
You will also need a mail service of some form. A free option such as
gmail will suffice.
Installing hMailServer
Follow these steps in relation to your installation directories.
Download the
hMailServer exe. (If that download link fails, visit the hMailServer
download page.)

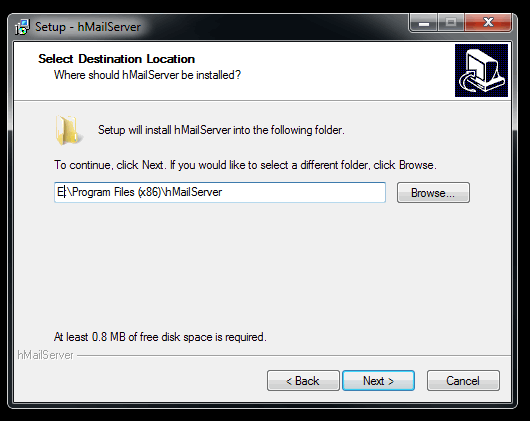
Open the installer. Accept the terms and choose your installation directory.
Select both Server and Administrative Tools.

Select to use external database engine

Determine if you want a Start Menu folder. I opted out, but that's your call.

The database wizard will pop up. Press next.

Select "Create a new hMailServer database"

Select "MySQL" as your database server type.

At this point, we are brought to a form where we need to enter our database connection information.

If Using 32bit MySQL
If you're on a 32bit Windows OS, open up the directory where MySQL is installed. It will usually be C:\Program Files\MySQL\MySQL Server 5.X\. Open up the lib folder, and locate libmysql.dll.

If Using 64bit MySQL
If you're on a 64bit Windows OS using 64bit MySQL, it's important to note that hMailServer itself is a 32bit program, so it requires a 32bit dll from MySQL. You'll need to download
libmysql.dll 32 bit and use it in the next step.
endif;
Now that you have located your appropriate version of libmysql.dll, copy it to the "bin" folder of your hMailServer installation.

Switch back to the database configuration form. Your "Database Server Address" and Port will be localhost and 3306 respectively unless you specified otherwise in your MySQL installation. Database Name is whatever you want the database to be called. I call mine "localmail". Your server authentication is a username/password combination that acts as the "root" account for your MySQL server. In my case, the account is the default of root.

From the service drop down menu, select MySQL. Make sure the MySQL service is running in the background.

If all goes well, you will get a message confirming that the database was created successfully.
Configuring hMailServer
Now that we have hMailServer installed, we need to configure it so we can use it to send mail.
After the Database was successfully created, hMailServer will ask you to specify a main password.

After you specified your main password, open hMailAdmin.exe in the Bin folder of your hMailServer installation.

Select the localhost - Administrator pair and press connect. (Note: Administrator is an important keyword in hMailServer. Do NOT change the username to something else.) Your password will be what you just specified as the "main password".

From the welcome screen, select Settings -> Advanced -> IP Ranges -> My Computer. Make sure all boxes under "Require SMTP authentication" are UNchecked. Make sure to save.

Now go to Settings -> Protocols -> SMTP, and then the "Delivery of e-mail" tab.Write "localhost" as your Local host name.

As for the SMTP Relayer, this depends entirely on the email service you wish to use. I highly recommend creating a
free Gmail account to follow along with these next few steps.
Whether you're using gmail, yahoo, a web host, or an ISP, you will need the following information:
- Host name
- Port Number
- Username/Password Authentication (if required)
Google
conveniently provides this information for their Gmail service. Through some searching, you can find this information for whatever mail service you use by searching for "SMTP Client Configuration _______", where ___ is your desired email provider.

Using one of my gmail accounts as an example, here is how my configuration looks.

Save the configuration, and restart your Apache webserver. Now we're finished!
Testing the Configuration
Now we need to see if our mail server actually works. Here's a simple php script that'll test our configuration.
<?php
$to      = 'youremail@yourdomain.com';
$subject = 'the subject';
$message = 'hello';
$headers = 'From: webmaster@example.com' . "\r\n" .
    'Reply-To: webmaster@example.com' . "\r\n" .
    'X-Mailer: PHP/' . phpversion();
date_default_timezone_set('America/Chicago');

$mail = mail($to, $subject, $message, $headers);
if($mail){
echo "YES";
} else{
echo "NO";
}
?>
The script will print "YES" if the email sent, and you should find that you have new mail in your inbox!
Feedback
Did you find this tutorial helpful? Did you come across any problems? Let us know in the comments below!
March 13, 2011
